I got my first proper camera when I was about 15 and remember thinking that my photography would instantly improve. I thought that when I got another camera a couple of years later and another one a few years after that. But each time my photography didn’t get any better and I grew increasingly frustrated. Why couldn’t I replicate what I was seeing with my eyes in to my photos? It must be the tools rather than the worker right?
Obviously not. It was me. I had made the common mistake of thinking that if I bought a shiny new camera then my skills would improve instantly. All the gear (well some) and no idea summed me up. It was only in my late twenties when I made a much more conscious effort to improve and had some lessons that my photography got to a level where I’m confident to share it and get a small amount of paid work.
A few people have asked for tips and it got me thinking about what I wish I’d learnt much earlier on. So here are my top five tips, regardless of how shiny or new your camera is.
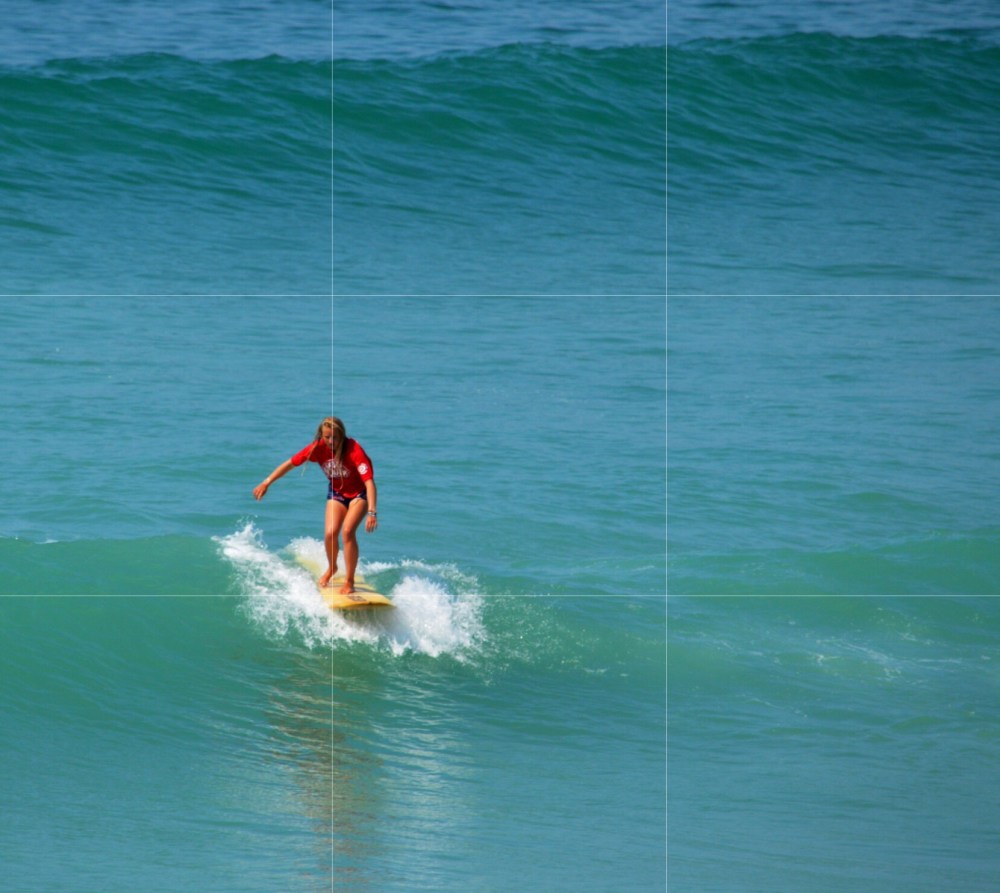
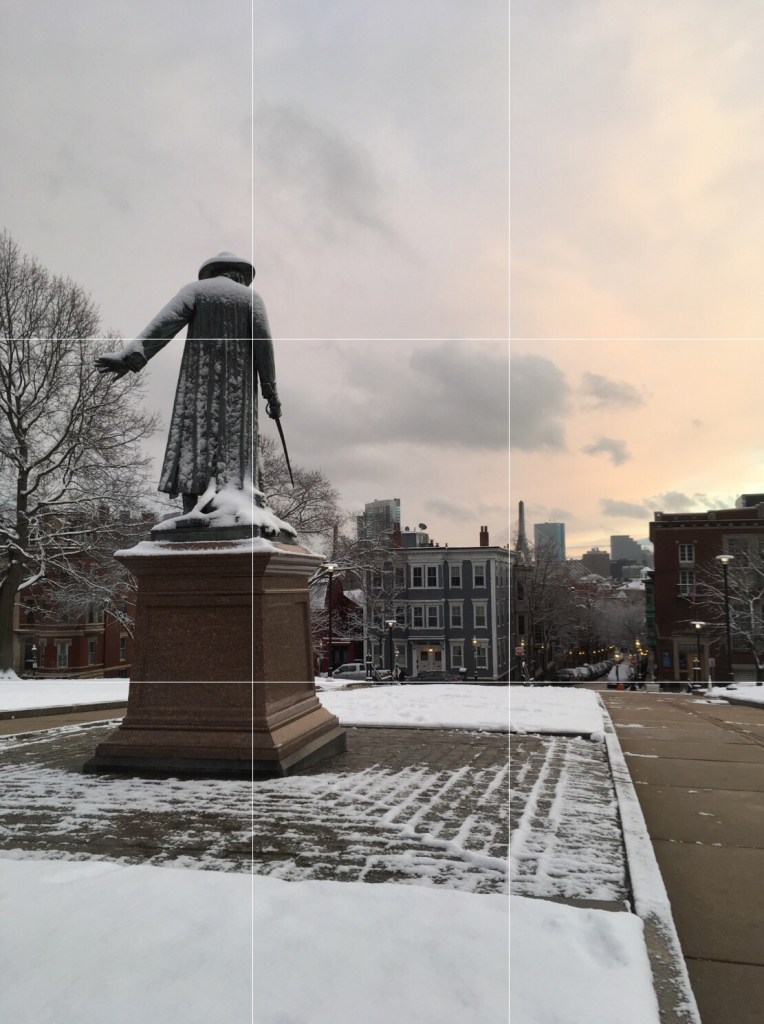
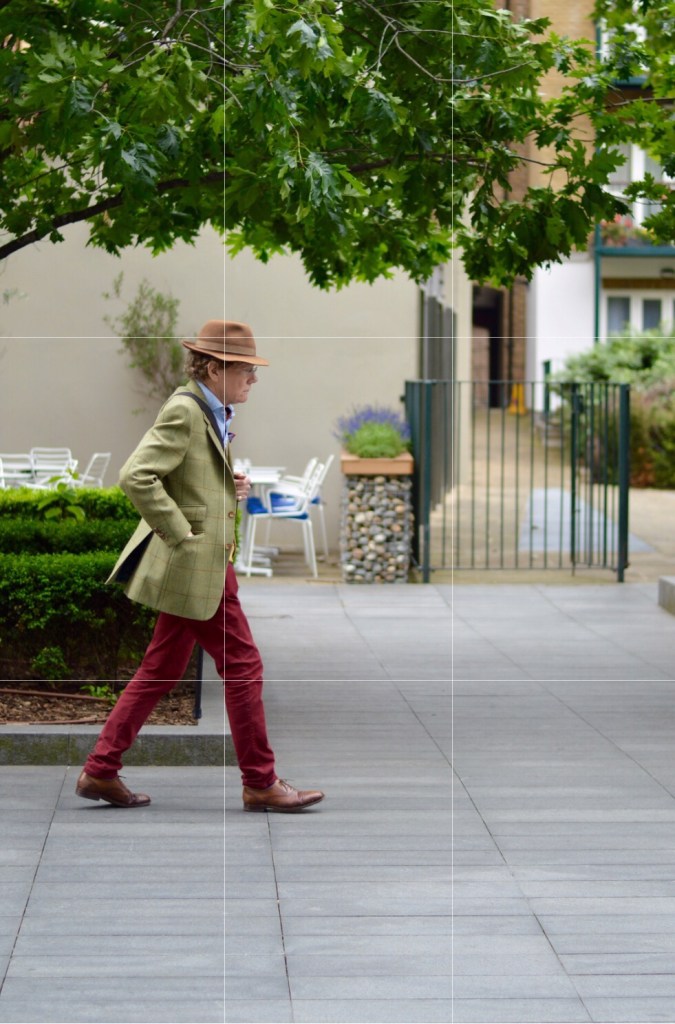
1. The rule of thirds
If you make one change to your thinking about composition when you take a photo, make it this one. Basically this involves breaking up your photos in to thirds, both horizontally and vertically, like the image below shows.

This gives us four intersecting points where we should aim to place the most ‘interesting’ part of our image; be it a face, mountain, animal or anything else you’re taking a photo of.
Additionally the lines themselves are also important. Trying to ensure that other parts of the photo, such as the horizon, roughy follow this lines makes the photo appear much more balanced to the viewer.

Here are a few examples, with the grid lines included, where I’m trying to use the rule of thirds and capture the most interesting part of the photo on at least one of the four points described above.

2. Foreground interest
Ever seen a beautiful mountain view or an image across a lake that you’d like to capture but it comes out a bit boring once you take a look at the photo? A likely reason is a lack of foreground interest in the photo. When we see a view in front of us our brain can add depth to the image, but this is much harder to do when we look at a two-dimensional photo. Adding something to the foreground, even if it isn’t the main point of the photograph, adds that depth to the image making it much more pleasing on the eye.
If you look at the photo below it would be a perfectly nice sunset shot but having the sun shade, and to some extent the running children, in the foreground adds a huge amount of depth to the photo.

Similarly this photo would be a nice lake and mountain shot but including the front of the boat in the foreground makes it much more interesting.

3. Get high, get low
It’s easy to always shoot your photos from a standing position and never change your angles. However, you’re potentially missing out on transforming your images by just crouching or jumping on a ledge to change the height from where you take them. This is particularly true when taking photos or children or animals; always try to be the same height as their eyeline.
I really love this photo below, especially the colour of the monkey’s eyes, but it would have been so much better if I’d stooped a little and got level with it.

Like I did when recently taking a photo of my cat.

Getting a new angle can really change your landscape photography as well and is also an easy way to add foreground interest; like in this photo of St Michael’s Mount showcasing the cobblestones on the causeway.

4. Leading lines
Leading lines is a composition technique where the viewers’ eyes are drawn in to the image by a line. Good examples include roads, rivers or bridges, but it could be anything as long as it grabs the viewers’ attention.


5. Edit your photos (it isn’t scary)
When I heard photographers talk about editing their photos I would often imagine this would mean hours of painstaking work sitting over a complicated programme like Photoshop. It can mean that but you can make almost instant improvements to your photos with just a few quick edits in your smartphone.
Firstly, always make sure the horizon is level, there’s nothing worse than a beautiful photo but the axis of the earth is tilted. Secondly, using the auto-correct function can often make your photos ‘pop’ at the touch of a button. Having an explore of the other features such as contrast and saturation can improve the image and changing it black and white can completely transform the feel of the image as well.
I edited the photo below, of a Vietnamese lady I met, quite a bit (more than I often would) but the results are striking.


Bonus tip: break all of the rules
Yep, once you’ve learnt the rules learn when to break them. Some photos will ignore all of the above and just work. At the end of the day it’s all about which photos you love and no one else so practice, experiment and find out what you like.
I look forward to seeing the results!
